I accidentally deleted important files from an APFS-formatted Mac drive and don’t have a Time Machine or iCloud backup. I’m trying to figure out if APFS file recovery is still possible, what tools or steps are safest, and how to avoid overwriting anything before I make it worse.
First thing I’d do is stop using that drive. Seriously. Don’t save anything to it, don’t install recovery tools on it, and don’t keep poking around hoping the files show back up.
The odds depend a lot on what kind of drive it is. With a regular hard drive (HDD), deleted files are often still recoverable until something new gets written over them. With an SSD, it gets messier because of TRIM. If TRIM has already cleared those blocks, recovery software won’t be able to bring the data back. That’s why the “stop using it right away” part matters so much.
I was in a pretty similar spot and ended up using Disk Drill. It was more straightforward than I expected, but the important part is how you use it.
What I’d do:
- Install Disk Drill on another drive, not the one you’re trying to recover from.
- Connect the APFS drive that has the missing files, or choose the internal drive if that’s where they were.
- Give Disk Drill Full Disk Access when macOS prompts you. Without that, it may not scan some APFS volumes properly.
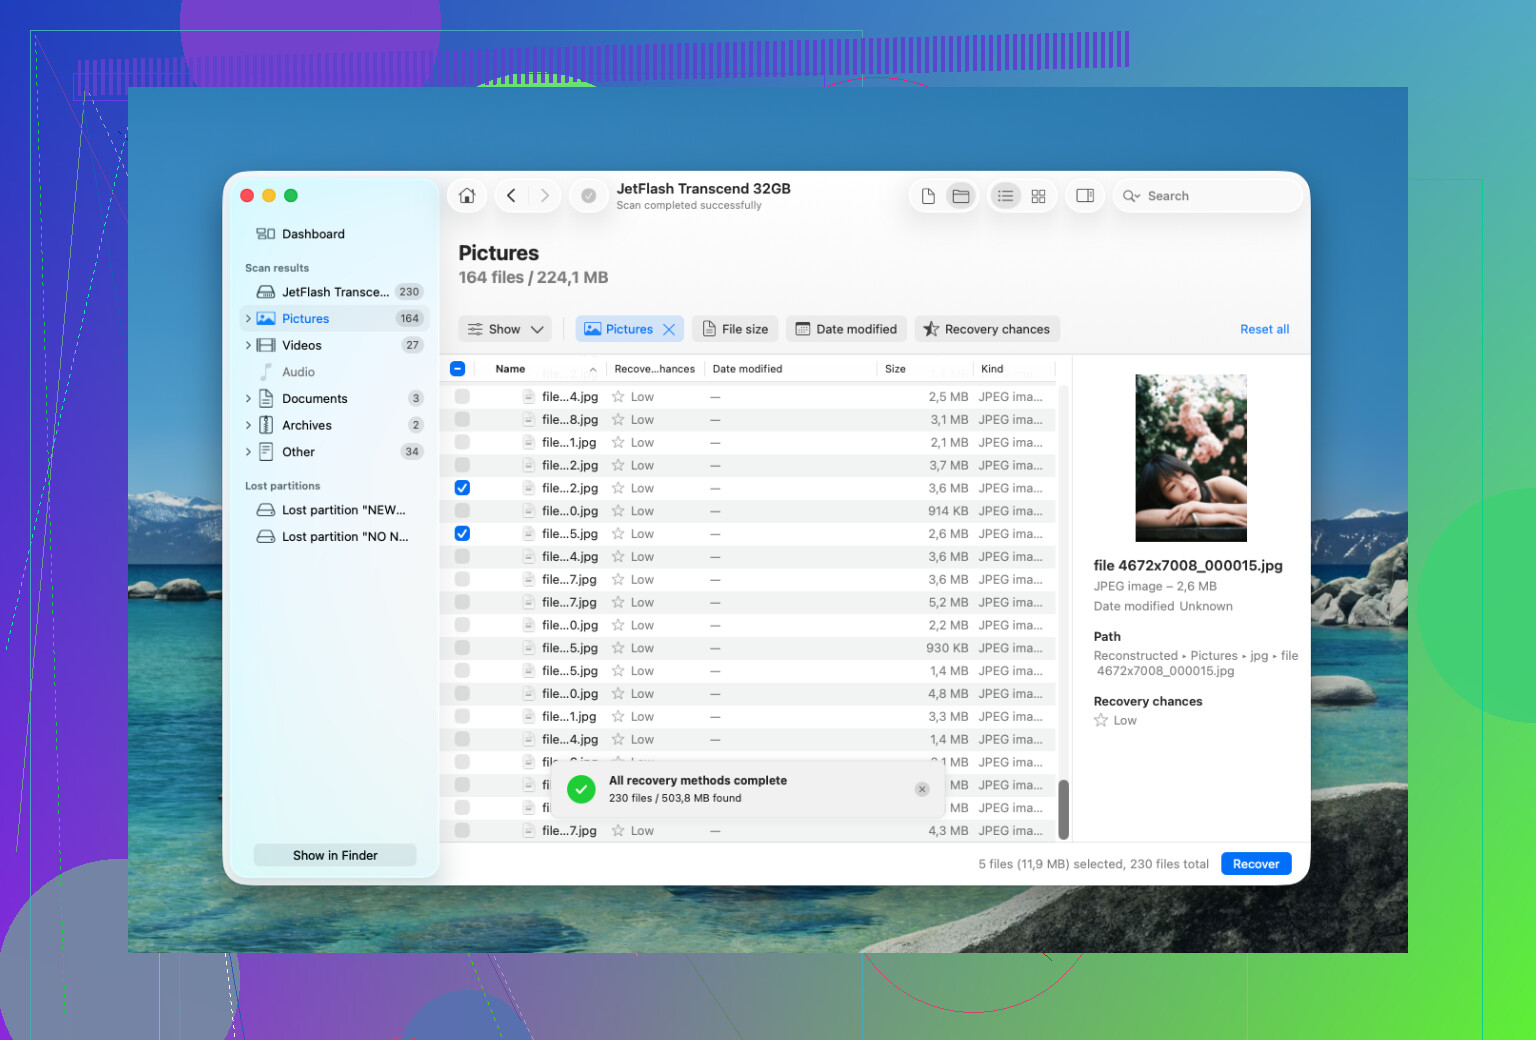
- Select the APFS volume and run the full scan, the “Search for Lost Data” option.
- Let the scan finish before grabbing the first files it finds. Waiting found more stuff for me.
- Use preview before recovering anything, especially for photos and documents. If it previews correctly, that’s usually a better sign.
- Recover the files to a different drive. Never restore them back onto the same APFS volume you’re scanning.
One useful thing about Disk Drill is that it can keep the original folder structure for a lot of files. That matters more than it sounds, because sorting through thousands of recovered files with random names is miserable. It also gives recovery chances for many items, so you’re not completely guessing before you recover a bunch of files.
If the drive was erased in Disk Utility, that doesn’t automatically mean everything is gone. A quick erase often wipes the file system info without immediately overwriting all the actual data. Recovery can still work in that case, as long as new data hasn’t been written over it. The big exception is an encrypted APFS volume. If FileVault was on and the drive got formatted, losing the old encryption keys usually means the old data is not coming back.
If Disk Drill doesn’t find what you need, PhotoRec is another option. It’s free, but it works differently. It scans for file signatures instead of reading APFS metadata, so you’ll usually lose the original filenames and folders. Still, for photos or videos, it can be worth trying.
I would not keep doing DIY scans if the drive seems physically unhealthy. Stop if it:
- keeps disconnecting,
- clicks, grinds, or beeps,
- only shows up sometimes,
- or freezes every time you scan it.
At that point, a recovery lab is the safer move. Powering up a failing drive over and over can make the damage worse. A lot of reputable places will do a free evaluation, and many offer “no data, no fee” service. Pricing can be a few hundred dollars for a logical recovery, but physical damage or clean-room work can easily push it past $1,000.
If this is just deleted files or a quick format, though, you’ve probably got a much better shot, especially if you stop using the drive now and recover everything to a separate disk.
12 Likes
Don’t boot from that Mac if the deleted files are on the internal drive.
That is the part people sometimes miss. Even “just checking email” or restarting a few times can create writes: caches, Spotlight indexing, swap files, app updates, logs, all the boring macOS background stuff. On an APFS SSD, that can matter a lot. If it’s an external APFS drive, unplug it. If it’s the internal drive, shut the Mac down and think about recovery from another boot source or another Mac before doing scans.
I agree with the general Disk Drill/PhotoRec advice, but I’d make an image of the drive first if the data is really important. Scan the image, not the original, when possible. That way if a scan crashes, the drive starts acting weird, or you choose the wrong recovery destination, you haven’t made the situation worse. Some recovery apps can create a byte-for-byte image, and there are command-line ways too, but don’t experiment on the only copy if you’re already nervous.
For APFS specifically, don’t expect a clean “undelete” like the old days. Sometimes you get proper names and folders. Sometimes you get a pile of files with missing names. Sometimes the previews look fine but the recovered file is still damaged. Preview before restoring, recover to a separate disk, and prioritize the irreplaceable stuff first instead of trying to save every cache and duplicate. If you want a visual walkthrough, this macOS file recovery video may be easier to follow than guessing through buttons, but the key rule stays the same: don’t write anything back to the source drive.

Check for snapshots before you start carving files.
The earlier advice about not writing to the drive is right, but APFS has one slightly less obvious escape hatch: local snapshots. Even if you do not have a current Time Machine backup disk attached, macOS may have made APFS snapshots during updates or previous Time Machine activity. If the deleted files existed when one of those snapshots was made, recovery may be more like copying the old version out than doing messy file recovery.
I would check that from Recovery, an external boot drive, or another Mac if possible, not by casually booting back into the same system and using it for an hour. In Terminal, things like tmutil listlocalsnapshots / or diskutil apfs listSnapshots can tell you whether snapshots exist. If they do, deal with those first. Don’t delete snapshots to “free space,” don’t run cleanup apps, and don’t enable Time Machine now hoping it creates something useful. That can create more writes.
If there are no useful snapshots, then yes, Disk Drill or PhotoRec-style recovery is the next lane, with all the SSD/TRIM caveats people already mentioned. But I’d try the snapshot route before accepting a pile of renamed recovered files, because when it works, it preserves names, folders, and file contents much more cleanly.
Whether this is the internal SSD in a T2/Apple silicon Mac or an external drive changes the odds a lot.
If it is the built-in SSD on a recent Mac, I would treat “deleted with no backup” as time-sensitive and possibly already unrecoverable, especially if the files were removed days ago and the machine kept running. APFS is not the main villain by itself. The bigger issue is SSD behavior, TRIM, encryption, and normal macOS background writes. On those Macs, the window where recovery software can see useful old data may be very small. In that case, snapshots are probably your best shot, like @mikeappsreviewer said.
If it is an external APFS hard drive, the story is much less grim. Deleted files may still be sitting there until overwritten. For an external APFS SSD, it sits somewhere in the middle, depending on TRIM support and how much it has been used since deletion.
The small thing people forget: when you connect the drive to another Mac, macOS may mount it and start doing “helpful” things. Spotlight, Finder preview generation, Photos library checks, and repair prompts are not your friends here. If the drive is external, don’t click Repair, don’t browse through folders for half an hour, and don’t copy random recovered test files back onto it. If you know how, work from a read-only mount or make an image first. If you don’t know how, at least keep the handling minimal and recover to a separate disk.
Disk Drill is reasonable for this kind of job, but I would not treat the scan results page as a promise. A file name appearing does not mean the contents are intact. Preview is more important than the recovery percentage. If the missing stuff is office documents, photos, videos, project files, or a Photos library, test a few recovered copies from a separate destination before spending hours recovering everything. A recovered file that opens halfway and then fails is still a failed recovery.
So yes, APFS recovery is possible in some cases. The order I’d use is: check snapshots first, image the drive if the data matters, scan the image or source from another boot environment, recover only to another disk, then verify the recovered files. If this is a modern internal Mac SSD with no snapshot and it has been used since the deletion, keep expectations low. If it is an external HDD and you stopped using it right away, your chances are much better.