I accidentally deleted every photo from my SD card while trying to free up space, and some of them were family pictures I haven’t backed up anywhere else. I need help figuring out if SD card photo recovery is possible and what steps I should take right away to recover deleted photos before they’re gone for good.
I ran into this more than once, and the main thing is speed. If you deleted photos from an SD card and stopped using it right away, your odds are usually decent.
What happens after deletion is less dramatic than people think. Most cameras and computers do not wipe the image data on the spot. They remove the file table entry, so the card looks empty even though the photo data is still sitting there. Once new shots or videos land on the card, old data starts getting replaced. So first move, stop. No more photos. No more video. Don’t copy a single thing onto it.
If I were doing this on my own card, I’d start with Disk Drill. I used it on camera cards, drone footage, a Switch microSD, and one dash cam card that looked cooked but wasn’t. It’s easier than most recovery tools I’ve tried, and it handles SD media better than a lot of the free stuff.
What stood out for me was how it deals with more than simple deletion. If the card turned RAW, shows unreadable, got corrupted, or you formatted it by mistake, it still has a shot. It also reads the usual image types, JPG, PNG, CR2, NEF, ARW, DNG, plus other RAW formats from Canon, Nikon, Sony, Fujifilm, and the rest.
Video is where a lot of tools fall apart. SD cards from GoPros, drones, and mirrorless cams often store clips in fragments. I’ve seen cheap recovery apps pull back half a file or a clip with no preview. Disk Drill did better there for me. Not perfect, still better.
Here’s the way I’d handle it.
- Pull the SD card out right away.
- Use a card reader and plug it into your computer. I avoid connecting through the camera when I can.
- Install and open Disk Drill.
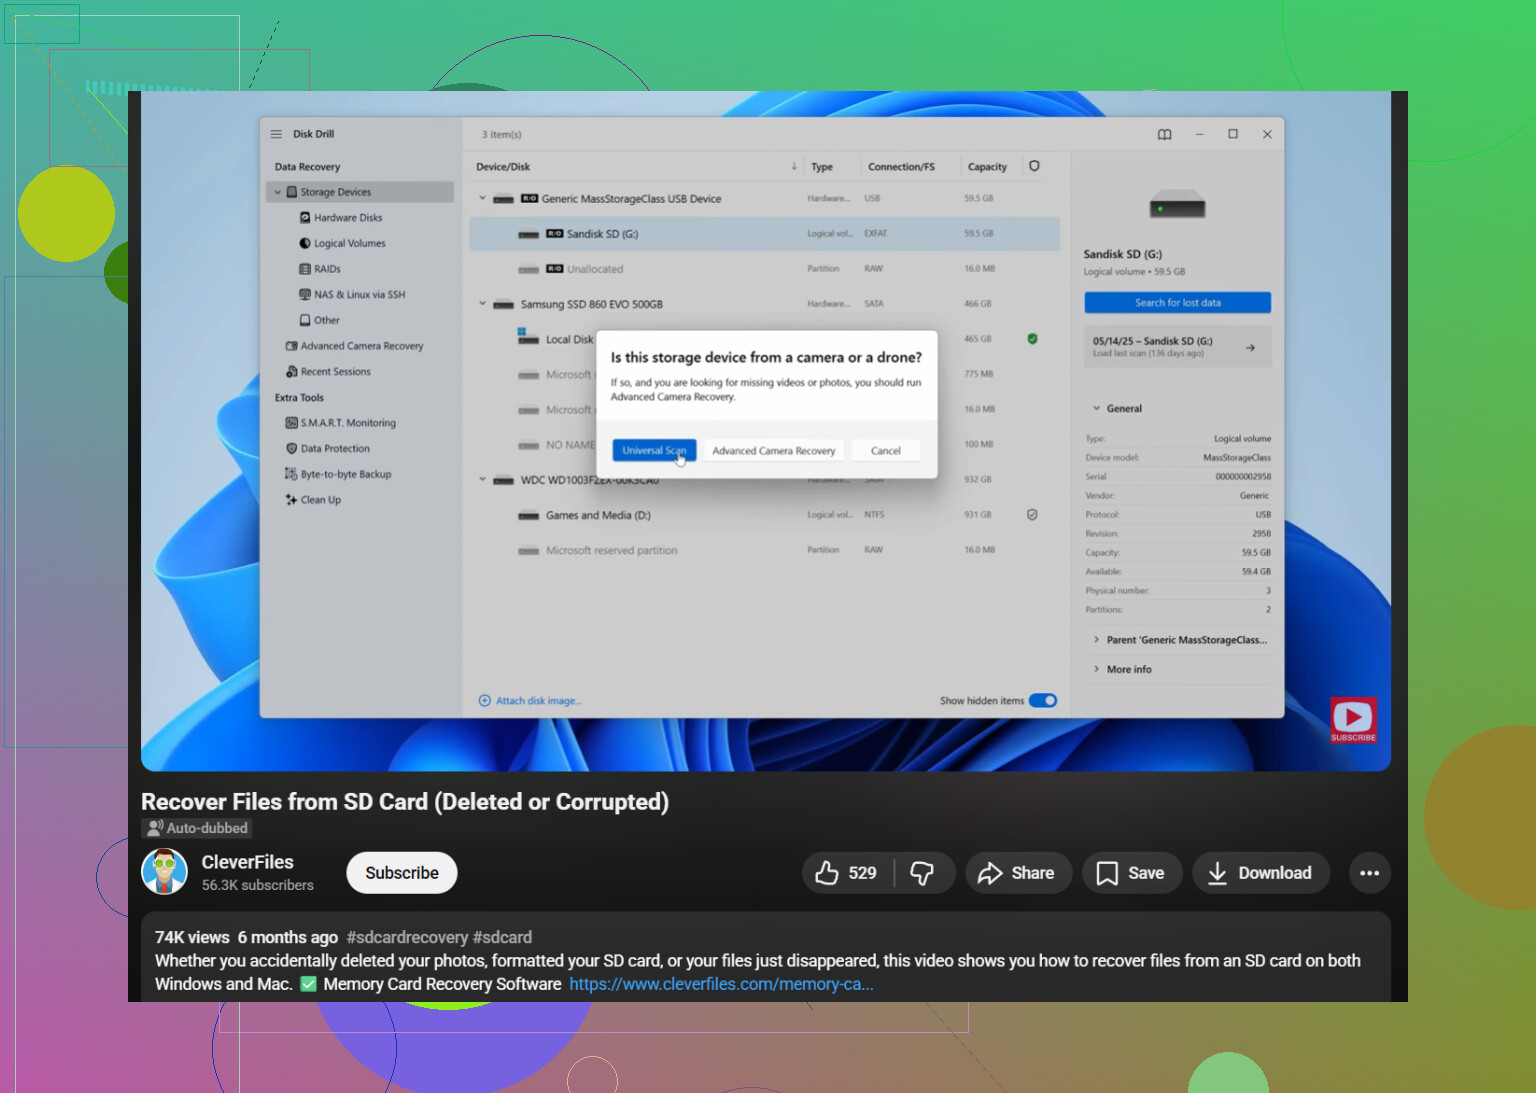
- Pick the SD card from the drive list.
- Hit “Search for lost data” and run the Universal Scan.
- Wait for the scan to finish. Don’t rush this part.
- Open “Review found items” and check the Pictures category.
- Preview files before recovering them. If a photo previews cleanly, I usually take it as a good sign.
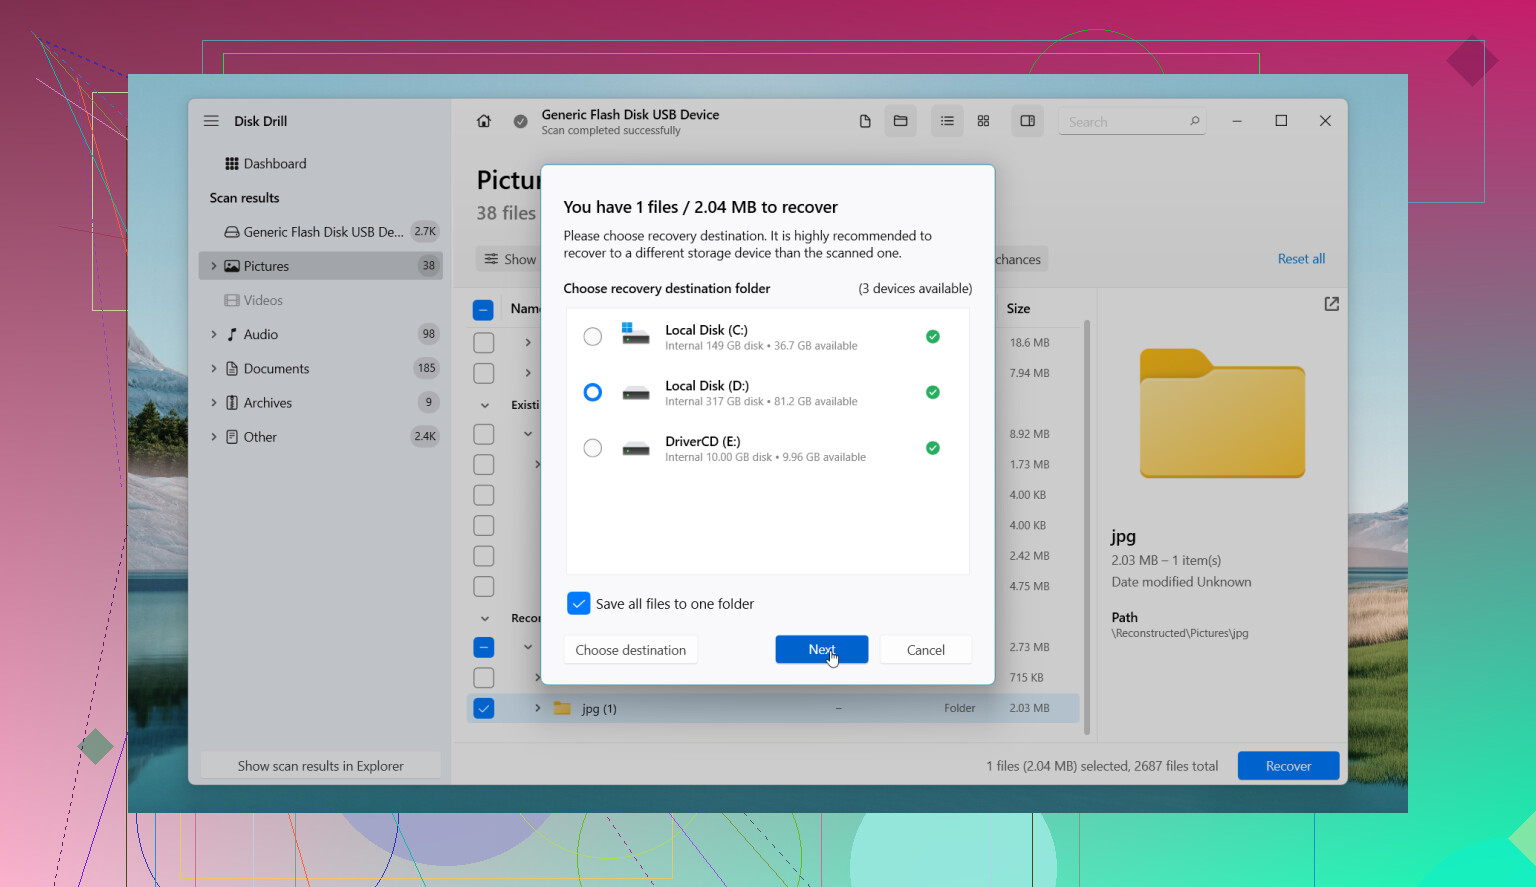
- Save recovered files somewhere else, never back onto the same SD card.
Even when the card looks blank or asks you to format it, I wouldn’t assume the photos are gone. I’ve had cards show up as RAW and still cough up most of the images. Sometimes the file system gets damaged while the photo data stays there.
One thing I learned the hard way, if the card starts disconnecting, freezing the app, or acting flaky, make an image backup first and work from that copy. A byte-for-byte image gives you a full clone of the card, which is safer than hammering the original over and over. Disk Drill includes that option.
The free tier is enough to test the waters. You get scanning and previewing on both platforms. On Windows, it allows free recovery up to 100 MB. On Mac, free use is more about previewing, so if you need a large pull, you’ll likely hit the paid wall fast.
If you want other options, these are the ones I’d keep in the toolbox.
- PhotoRec. Free, ugly, effective. I used it when I didn’t care about filenames. It often recovers the files, but you lose folder structure and names, which turns cleanup into a mess.
- DiskGenius. Better fit if the card has partition issues or file system damage. More technical screen layout, more knobs to turn.
- DiskDigger. Worth a look if the card sits in an Android phone and you’ve got no PC nearby. Less capable than desktop tools. Deep scans usually need root.
Last bit, and this matters. If the card has physical damage, vanishes at random, or the computer never detects it, software won’t do much. I’ve seen people keep retrying until the card got worse. At that point, a recovery lab is the safer move, even if it hurts to pay for it.
8 Likes
Yes, SD card photo recovery is possible if you stopped using the card fast enough. Deleted files usually stay on the card until new data overwrites them. So your first move is simple. Stop using the SD card now. Do not take more photos. Do not move files onto it. Do not format it.
I agree with @mikeappsreviewer on one part, speed matters a lot. Where I differ a bit is this. I would start by making a full image of the SD card first if the photos matter a lot. Working on a copy lowers risk if the card is unstable or if you click the wrong thing while tired and stressed.
My order would be:
- Lock the SD card if it has a write switch.
- Put it in a card reader, not the camera.
- Create a disk image of the card on your computer.
- Scan the image, not the original card.
- Recover files to your computer or an external drive.
For software, Disk Drill is a solid pick for SD card photo recovery because it previews images well, supports RAW photo formats, and handles deleted or formatted cards without a lot of setup. If the card was from a phone or camera and now shows empty, RAW, or corrupted, it still has a fair shot. Preview matters. If the pic previews clean, recovery odds are beter.
If you want a visual guide, this SD card photo recovery walkthrough is easy to follow.
One more thing. If the card clicks, disconnects, or is not detected at all, skip more DIY attempts. That is where labs earn their money.
Yep, maybe. But the answer is less “deleted = gone” and more “deleted = on borrowed time.”
I mostly agree with @mikeappsreviewer and @ombrasilente, but I’m a little less optimistic if you deleted everything from inside the camera or phone and then kept poking around the card after. Even just a few new files can trash the exact photos you care about most. So the big rule is still: stop using it, full stop.
One thing I’d add that they didn’t really lean on enough: check whether this was actual deletion or a fake-out caused by file system damage. Sometimes the photos are still there, but the card’s directory got corrupted, so it looks empty. In that case, recovery can be better than people expect. Also, if you used the card in an Android phone, look for hidden folders like DCIM, LOST.DIR, or app-created trash folders before assuming everything vanished.
If you want the least headache, use Disk Drill. It’s solid for SD card photo recovery because the preview is actually useful, and that matters more than people think. Previewable JPGs and RAWs usually mean the file data is intact enough to save. I’d also sort results by file type and estimated recovery chances first, not by folder name, because folder structure is often toast anyway.
Small disagree with the “always image first” advice: if the card is healthy and fully readable, I don’t think imaging is mandatory for every normal deletion case. Nice to do, yes. Required, nah. If the card is unstable, then yeah, image it before you sneeze near it.
Also, save recovered files to your computer or another drive, not back to the SD card. Sounds obvious, but people do it and then wonder why recovery got worse. Been there, made that dumb mistake once lol.
If nothing decent previews, try a second-pass tool like PhotoRec afterward. It’s ugly as sin, but sometimes it finds stuff other apps miss. Messy names, messy folders, still beter than nothing.
And if you want more real-world cases, this thread is worth a look: SD card photo recovery help from Reddit users.
If the card isn’t detected consistently, gets crazy slow, or throws read errors, stop DIY stuff before it gets worse. That’s the line where software starts being more hope than plan.
I’ll push back on one point from @ombrasilente and @cacadordeestrelas. Imaging first is smart, but not always the best first move if you are on a basic home setup and the card is perfectly readable. A long image job on a cheap reader can waste time or even fail halfway. Sometimes a read-only scan first is the faster reality check.
What I would do instead is this: check whether the photos were deleted normally or the card just lost its index. On Windows, look at Properties and used space. If the card looks “empty” but still shows space used, that often means directory damage, not true deletion. In that case, recovery odds are usually better.
Disk Drill is a good pick here because it handles both deleted files and broken file systems without a lot of fiddling.
Pros:
- easy preview for JPG and RAW
- good filtering by file type
- can recover from formatted or corrupted SD cards
- cleaner interface than PhotoRec
Cons:
- free recovery is limited
- deep scans can return lots of junk duplicates
- not the cheapest if you only need it once
If Disk Drill misses things, PhotoRec is still worth a second pass. Ugly, but stubborn. And yeah, save everything to another drive, not back to the card. @mikeappsreviewer was right about one thing above all: the less you touch the card now, the better your chances.