I accidentally deleted important files on my Windows 11 PC and already emptied the Recycle Bin before realizing I still needed them. I’m trying to find a free way to recover deleted files without risking more data loss or downloading something unsafe. What actually works on Windows 11, and what should I do first?
Losing the wrong file feels bad fast. I did this with a client folder once and my first mistake was panicking. The second mistake would have been keep using the drive. If this happened to you, stop writing data to that drive right away. No downloads. No installs. Don’t copy stuff onto it. Keep system use low if you can.
A deleted file usually isn’t gone on the spot. Windows often removes the reference first, then waits until new data lands over the old blocks. That gap is your chance. On SSDs, the window gets worse because TRIM can wipe deleted blocks behind the scenes. So timing matters.
What I’d check before touching recovery apps:
- Recycle Bin. I’ve seen people swear a file was gone and it was sitting there the whole time.
- OneDrive Recycle Bin, if you sync with OneDrive. Cloud sync saves people more often than they think.
- File History, Previous Versions, or any backup tool you turned on months ago and forgot.
- External drives, old USB sticks, another PC, email attachments, shared folders. I’ve recovered “deleted” work from a sent attachment before.
- Windows Search. Sometimes the file got renamed or dragged into some dumb folder by accident.
If none of those turn up anything, I’d move to recovery software fast.
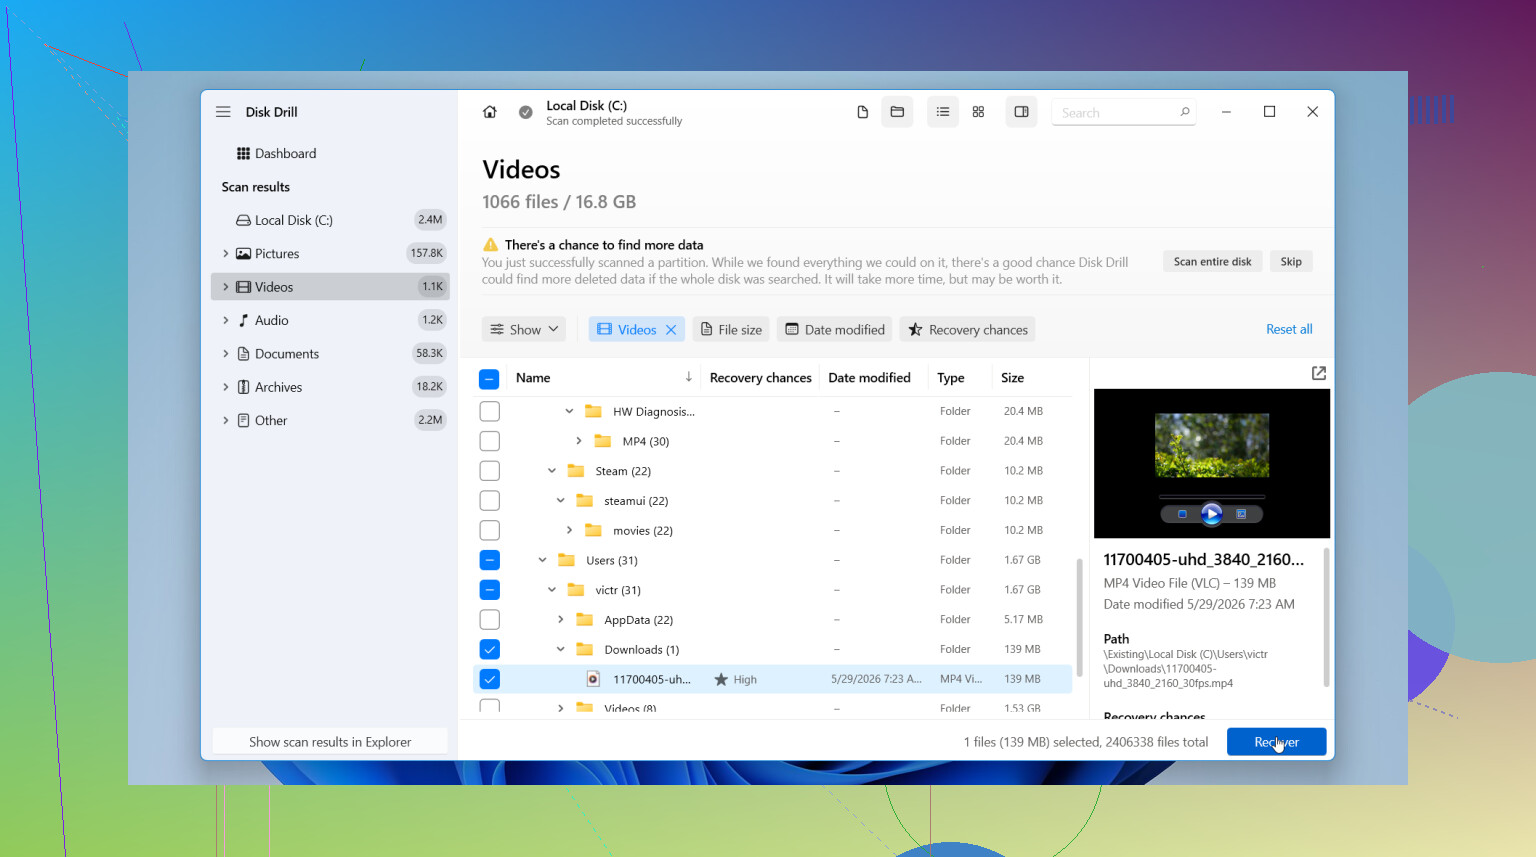
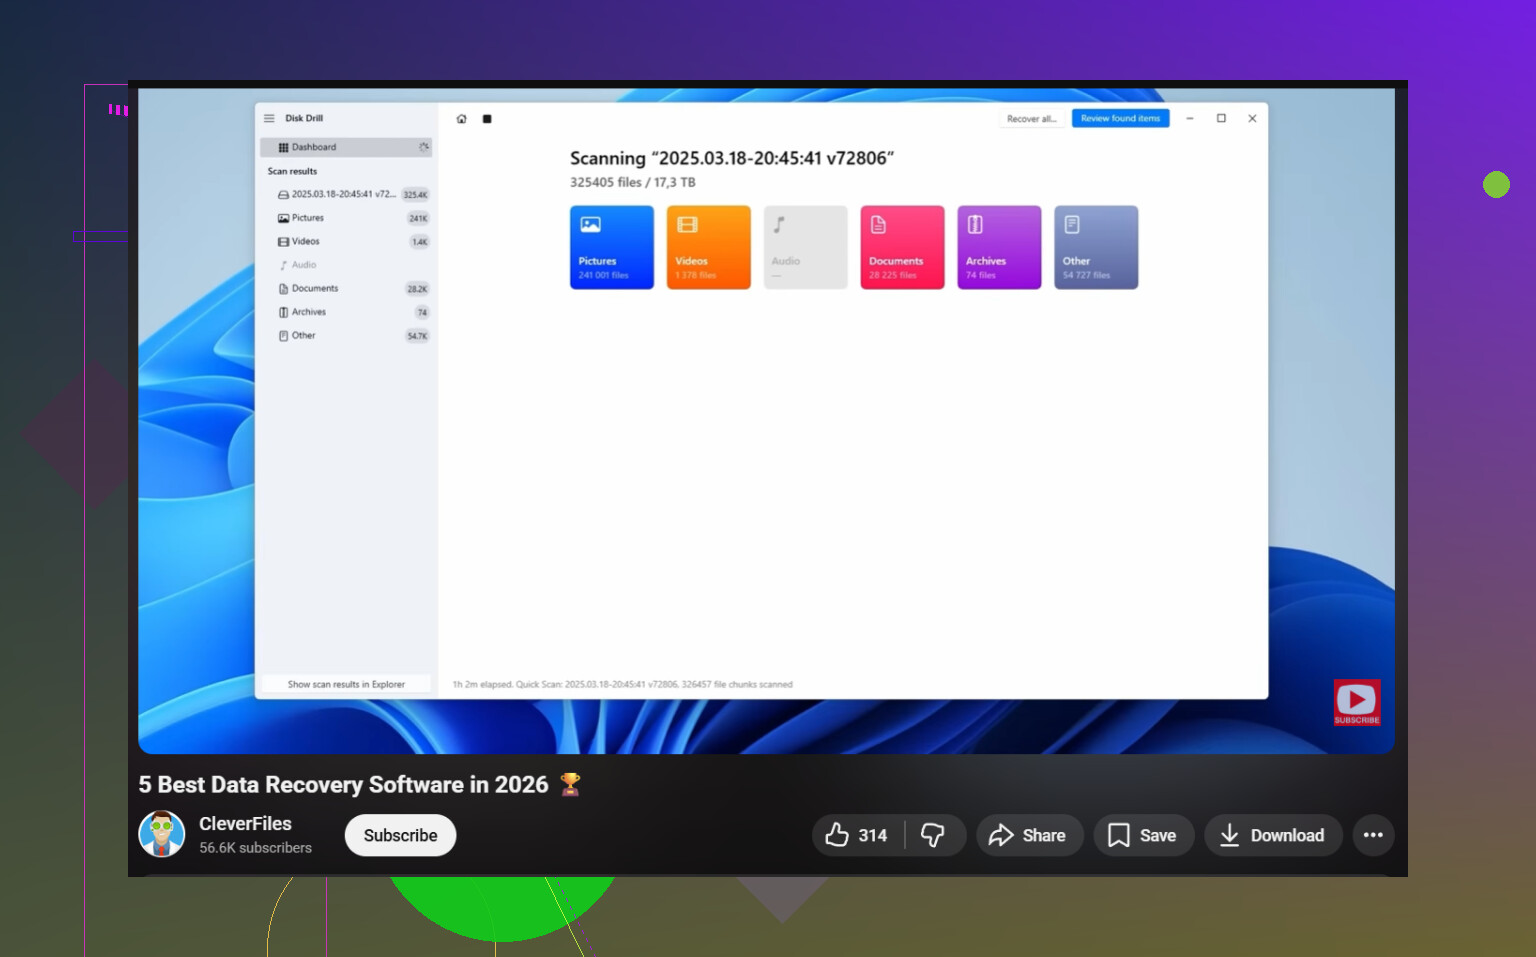
I’ve had better luck with Disk Drill than with most tools people throw around in forums. The big reason is simple. It doesn’t fight you. You pick the drive, scan, filter results, preview what you found, then recover to another location. For people who don’t do file recovery often, that matters more than fancy wording on a website.
My rough process:
- Install Disk Drill on a different drive if possible.
- Pick the drive where the missing file lived.
- Run the scan and let it finish. Don’t stop halfway unless you know why.
- Search by filename, type, or date if you remember any of it.
- Preview the file before restoring it.
- Save the recovered file to another drive, not the same one you scanned.
That last part matters. If you recover back onto the same drive, you risk overwriting other recoverable data. I’ve seen people do this once, then wonder why the second file came back corrupted.
The preview tool is the part I liked most. You get a quick check to see whether the file opens and looks intact before you spend time restoring junk. In my use, it also keeps filenames and folders better than some free options, when the file system info is still there. On Windows, the free version gives unlimited scanning and preview, plus up to 100 MB recovery at no cost.
If you want a free route, PhotoRec is the usual answer. It works. I’ve used it. It also dumps a mess in your lap after the scan. Since it leans hard on file signatures, filenames and folder paths often disappear. You end up sorting piles of stuff named things like f123456.jpg inside recup folders. Fine for bulk photo rescue. Less fun for finding one document from last Tuesday.
So if you want the cleaner path, I’d start with Disk Drill. If you want zero cost and don’t mind cleanup work after, PhotoRec still earns its place.
2 Likes
Yes, free recovery on Windows 11 is still possible, but your odds drop fast if you keep using the PC.
I agree with @mikeappsreviewer on one big point, stop writing to the drive. I disagree a bit on jumping straight to PhotoRec first for free use. It works, but for office docs it often turns recovery into a sorting nightmare.
Try this order instead.
- Check Windows File Recovery from Microsoft. It is free. It runs in Terminal, so it is less friendly, but it does a cleaner job than signature-only tools when the file system still has enough info.
- If the files were in Desktop, Documents, or Pictures, check OneDrive version history and its recycle bin.
- If you need a gui, scan with Disk Drill first. Free scan and preview helps you see if the files are still there before doing anything dumb. On Windows, the free recovery cap is small, so it works best for a few urgent files.
- If filenames do not matter, then use PhotoRec.
One more thing, SSDs on Windows 11 are rough for deleted-file recovery because TRIM often clears blocks fast. HDDs usually give you better odds.
For a simple walkthrough, this video on the best data recovery software for Windows PCs covers the basics pretty well.
Recover to a different drive. Not the same one. Thats where people mess it up.
Yes, sometimes. Not always. The free part is real, the timing part is the problem.
I mostly agree with @mikeappsreviewer and @stellacadente about not using the drive more, but I would add one thing people skip: if the deleted files were on your main C: drive and Windows is still running from it, every minute the system keeps doing background writes. So the safest free move is often to shut the PC down and work from another computer or bootable USB if you can. Kinda annoying, but safer.
A few free options they did not really get into:
- Check your temp app caches. Word, Excel, Adobe, and some editors keep autosave copies.
- If it was a downloaded file, check browser download history and source folders.
- Look in
C:\Users\YourName\AppDatafor app-specific recovery folders. - If you ever used Notepad, Office, or Adobe cloud save, there may be a version still floating around.
For actual free deleted file recovery on Windows 11, Microsoft’s Windows File Recovery is legit, just ugly to use. Best for people who can handle commands. If you want something easier to inspect first, Disk Drill is useful because you can scan and preview before deciding what to do. I don’t totally love free caps in recovery apps, but for a few critical files it can still be enough.
One thing I’d push back on: people treat PhotoRec like the default free answer. For mixed documents, that can be a hot mess tbh.
Also, if this was an SSD, be ready for dissapointing results because TRIM is brutal.
Helpful thread title: Windows 11 deleted file recovery tips after emptying Recycle Bin
I’d add one angle the others only touched lightly: if the file was deleted from an app workspace, you may recover it without doing block-level recovery at all.
Check these before any scanner:
- Office AutoRecover folders
- Adobe recent files and cloud cache
- Browser download history
- Email attachments you sent or received
- Teams, Slack, Discord, WhatsApp Desktop shared files
- Printer or scanner app export folders
- Temp folders for the exact app that created the file
I slightly disagree with the “shut down immediately no matter what” advice. On an encrypted BitLocker system, powering off can complicate things if you are not prepared. Better move fast and avoid writes than create a second problem.
If you do scan, Disk Drill is a reasonable middle ground after the built-in/free options already mentioned by @stellacadente, @techchizkid, and @mikeappsreviewer.
Pros for Disk Drill:
- easy preview
- better filtering than many free tools
- less chaotic than raw signature recovery
- good for checking whether recovery is even worth trying
Cons:
- free Windows recovery limit is small
- install itself can write to the disk if you are careless
- deep scans can return lots of junk and duplicates
Best practice: pull the drive and connect it to another PC as a secondary drive if possible. That reduces overwrite risk a lot. If the files are truly critical, make a full image of the drive first, then recover from the image, not the original. That is slower, but safer than poking the live disk repeatedly.