I accidentally quick formatted an HFS drive on my Mac and need to recover important files before anything gets overwritten. Has anyone used HFS recovery software successfully after a quick format, and what tools or steps are safest for Mac data recovery?
If this is an HFS or HFS+ Mac drive and the files matter, the main thing is to stop messing with the drive until you’ve pulled the data off. A lot of HFS recovery cases are still recoverable, including deleted files, emptied Trash, accidental formats, or weird unreadable-drive problems after a macOS update. What usually makes things worse is running repairs, formatting again, or copying new stuff onto the disk before recovery.
The safest order is usually:
- Stop using the drive right away. Anything written to it can overwrite the files you’re trying to get back.
- Check whether the drive itself is failing. For an HDD, check the SMART status using something like Disk Drill or DriveDx. If it shows a bunch of bad sectors or serious errors, don’t treat it like a normal software problem.
- If the drive looks unstable but can still be read, image it first. Scan the disk image instead of hammering the original drive with a full recovery scan.
- If the drive seems healthy and shows up normally, go straight to recovery software. Don’t run First Aid, don’t reformat, and don’t try random repair tools until the important files are copied somewhere safe.
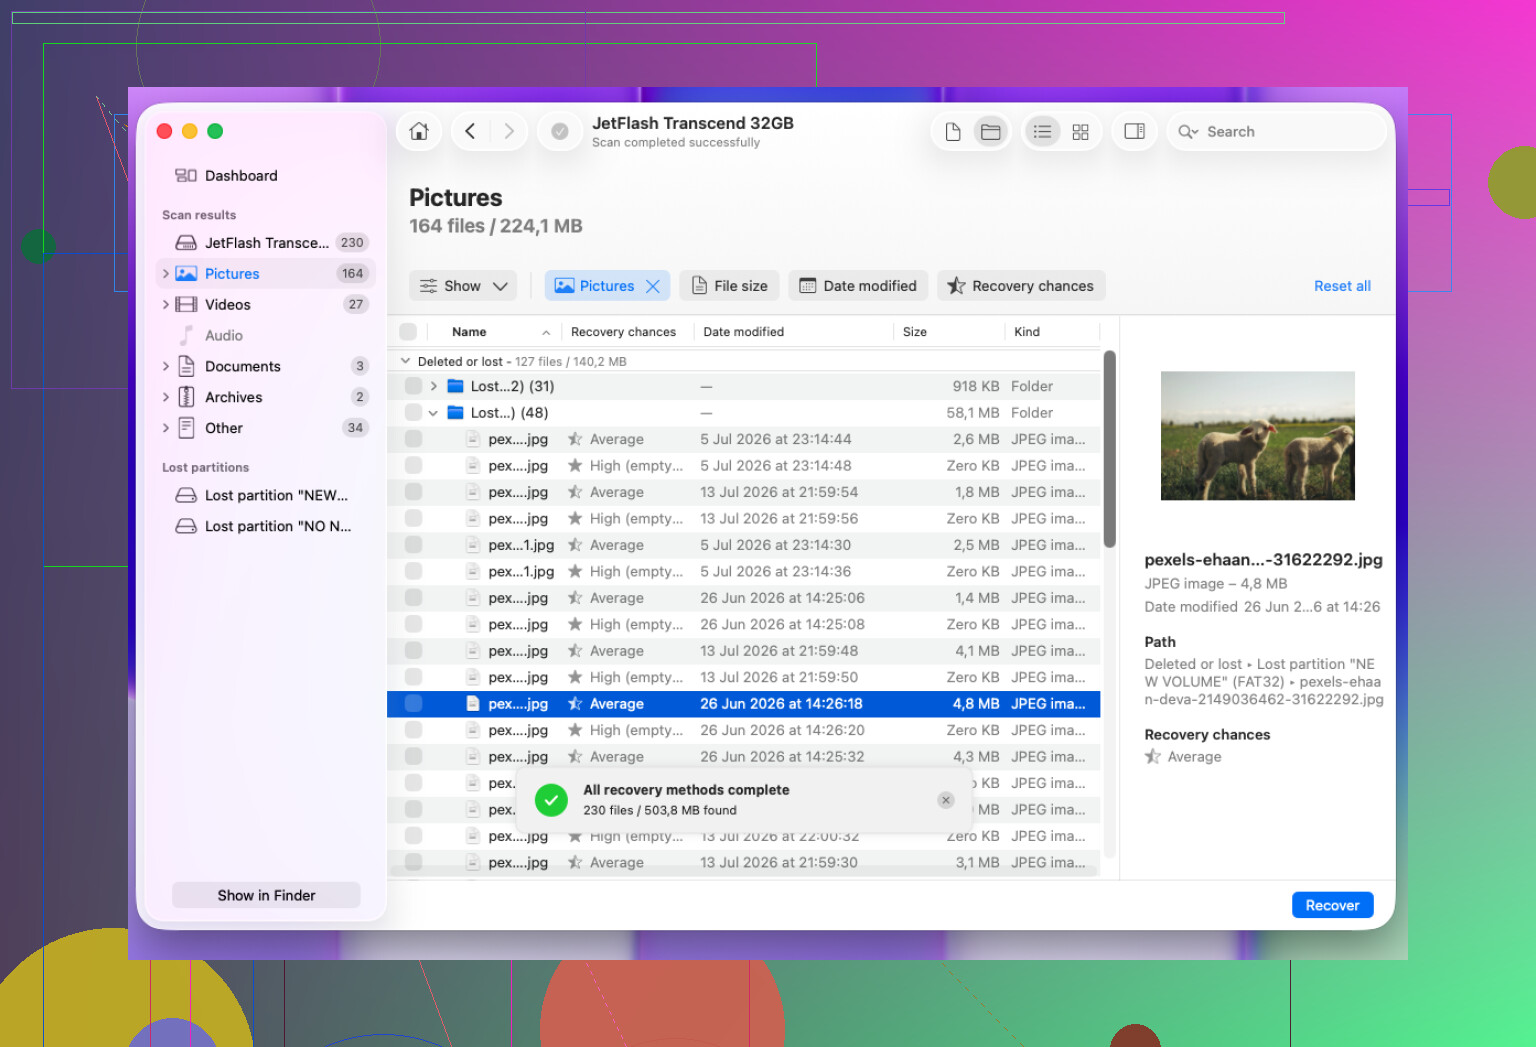
For a normal HFS/HFS+ file recovery job, Disk Drill is usually the easiest place to start. It supports HFS/HFS+, works with external and internal Mac drives, and the interface is simple enough that you don’t need to be a data recovery person to use it.
The basic flow is:
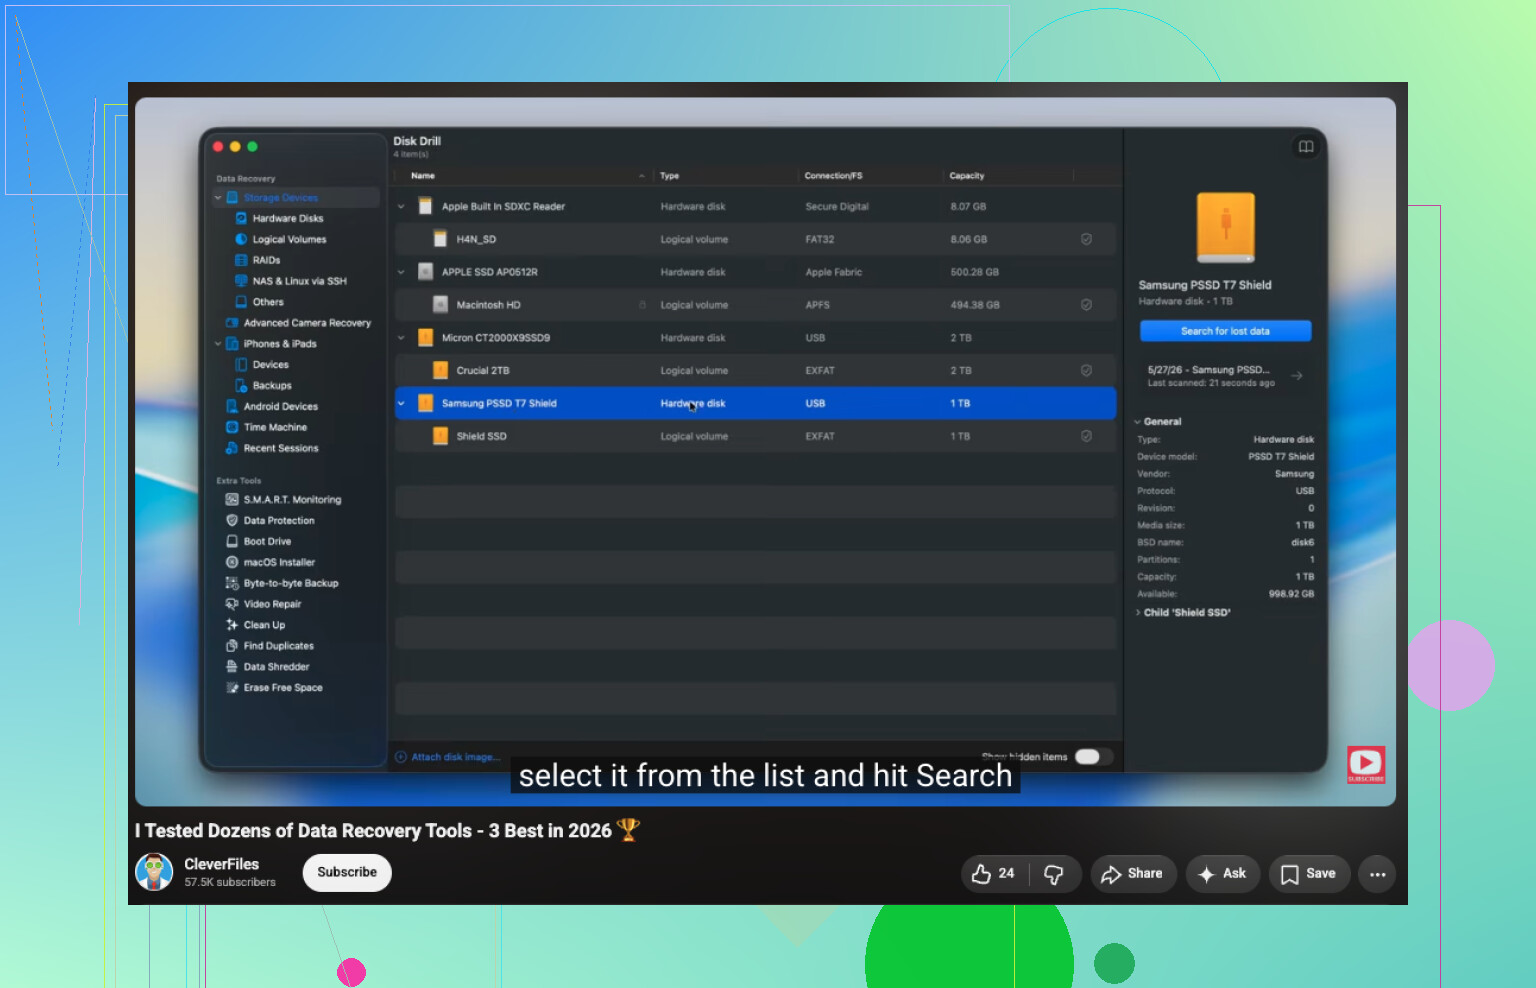
- Open Disk Drill and choose the HFS/HFS+ drive.
- Click Search for Lost Data. For external drives, Universal Scan is usually the right choice.
- Let the scan finish.
- Preview the files before recovering them.
- Save the recovered files to a different drive, not the one you’re recovering from.
If Disk Drill doesn’t turn up what you need, TestDisk can be worth a shot, especially if the issue is a missing HFS partition rather than a few deleted files. Just know it’s not nearly as friendly since it’s text-based. And if you have a recent Time Machine backup, use that first. That’s usually the cleanest and lowest-risk option.
Quick formats and emptied Trash situations are often recoverable because the actual file contents usually aren’t wiped immediately. The problem starts when new data gets written over the old data. That’s why speed matters, but careful speed. Don’t rush into “repair” steps that can change the disk.
I’d stop with DIY recovery if the drive doesn’t show up in Disk Utility, keeps dropping offline, makes clicking or grinding sounds, or recovery tools keep failing with read errors. That points more toward hardware failure than a simple HFS file system issue. In that case, repeatedly powering it on can make recovery harder, so a proper recovery lab is probably the better move.
10 Likes
A quick format on a healthy HFS+ hard drive is a very different job from a quick format on an SSD with TRIM active. In the first case, recovery software may still find the old catalog records or at least carve files from the remaining data. In the SSD/TRIM case, the drive may have already been told those blocks are free, which can make the result much worse even if you barely touched it afterward. So yes, Disk Drill or similar tools can work after a quick format, but don’t judge success until you scan from another Mac and recover to a separate disk. I agree with the “don’t run repairs” advice above, but I’d be even more cautious if this was an internal SSD or an encrypted volume, because those are the cases where people expect normal undelete behavior and get disappointed.
The hidden downside is that “recovered” does not always mean “recovered with names, folders, and dates intact.” After a quick format, some tools may find a lot of data, but if the HFS catalog was damaged or replaced, you can end up with thousands of files sorted by type with generic names. That is still better than losing them, but it can be a miserable cleanup job if you had lots of small documents or photos with similar names.
I agree with the others about not running First Aid or writing anything back to the drive. I’d be careful with one extra detail though: make sure you scan the physical device, not just whatever new empty volume macOS is showing you after the format. Some recovery apps make this obvious, some don’t. If the drive is external and healthy, Disk Drill is fine to try because you can preview before paying/recovering, but don’t take a “quick scan found nothing” as the final answer. Let the deeper scan finish.
If the files are truly important, clone the drive first and work from the clone. If they are important but not worth lab money, then at least recover to a totally separate disk and be prepared for imperfect results. Quick format on an HFS+ spinning drive is often recoverable. Quick format plus SSD/TRIM, encryption, or continued use after formatting is where expectations need to drop fast.
The sneaky downside is that macOS can write little “helpful” files to a newly formatted disk without you consciously copying anything to it. Spotlight indexing, .fseventsd, Trash folders, thumbnails, or backup-related stuff can all nibble away at the old data. So if the drive is still mounted on your Mac, eject it and leave it alone until you’re ready to scan or clone it.
Yes, HFS/HFS+ recovery software can bring files back after a quick format, assuming the format mostly replaced the file system structures and didn’t wipe the whole disk. I agree with the earlier point about scanning the physical disk, not just the new empty volume. That matters because the new volume is basically the “after” state. The useful data is often outside what that new file system knows about.
Disk Drill is a reasonable first try because you can scan and preview before committing, but I would not install it onto the same drive you’re trying to recover from. If this was an external HFS drive, install the recovery tool on your Mac’s main disk and recover to a different external disk. If this was the Mac’s internal drive, stop booting from it if possible and use another Mac, Target Disk Mode, an external boot disk, or a disk image approach. The less that drive gets used between the format and the scan, the better your odds.