My external hard drive suddenly started showing “The parameter is incorrect” in Windows, and I can’t open it without risking my files. I need help figuring out the safest way to recover data from the drive before trying any repairs or formatting.
Be careful with that error. 'The parameter is incorrect' doesn’t always tell you what actually went wrong. It can show up after the drive was unplugged without ejecting, after a power cut, or even because of a bad USB cable. Windows may refuse to open the drive, but that doesn’t automatically mean the files are gone.
The main thing is to stop writing to the drive for now. Don’t format it, don’t copy anything onto it, and don’t rush into CHKDSK if the data matters. CHKDSK can fix file system problems, but on a damaged or failing drive it can also change, move, or remove file system entries while trying to repair them.
I’d do the simple checks first:
- Use a different USB cable.
- Plug it straight into another USB port, ideally a rear port on a desktop.
- Try the drive on a different computer.
- Check Disk Management and see whether the drive shows up with the right size.
If Disk Management can still see the drive, even if File Explorer says it can’t access it, recovery is still a realistic possibility.
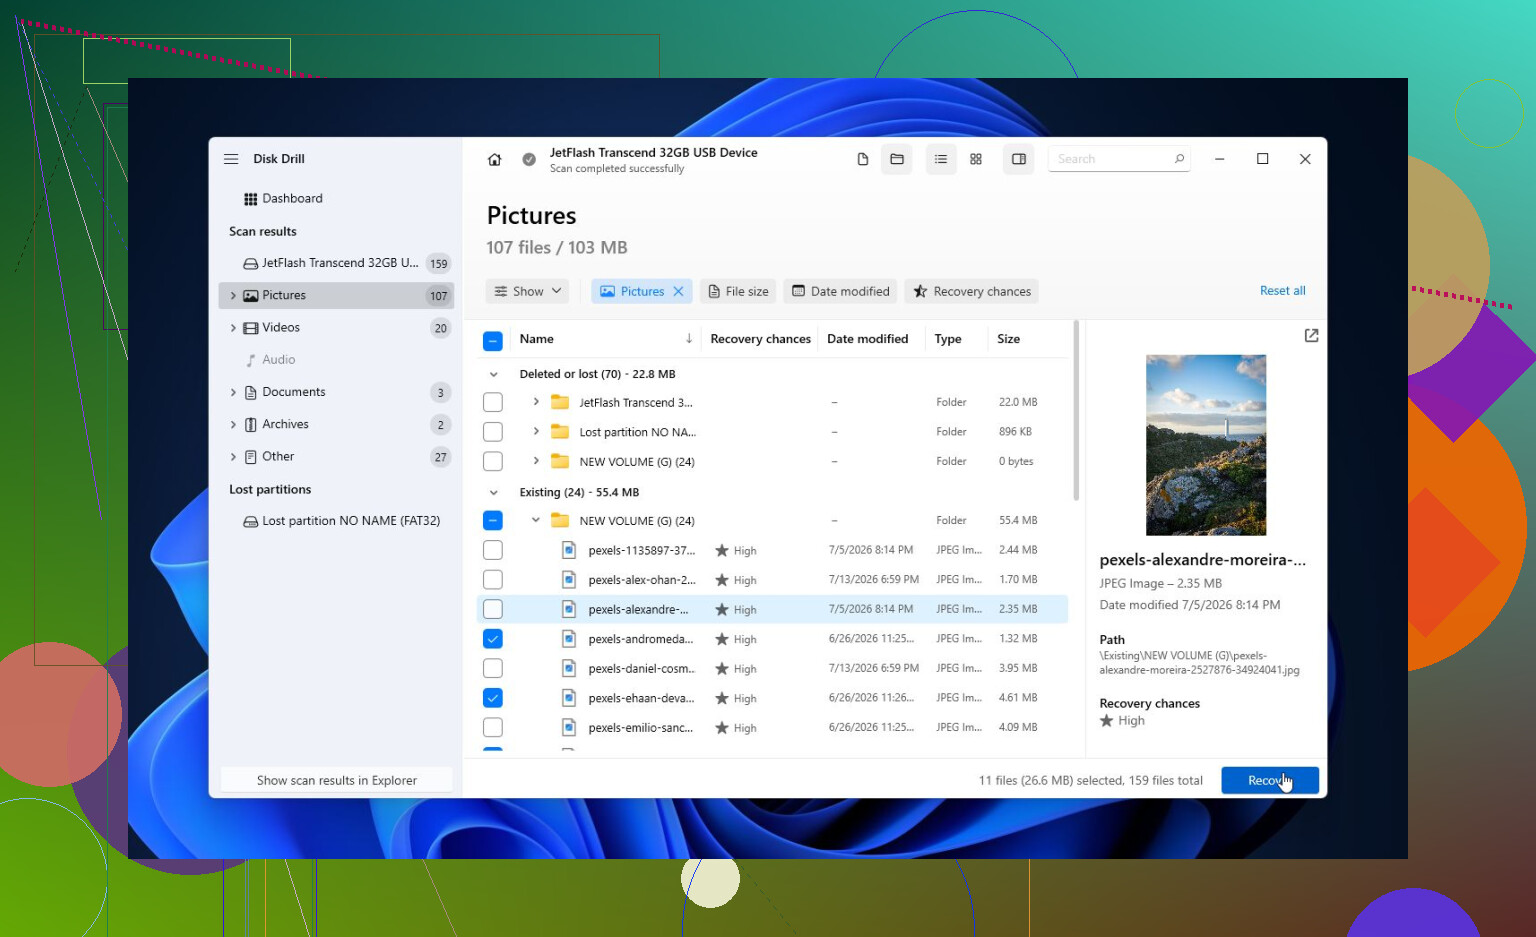
For getting the files back, Disk Drill is a reasonable option. It’s worked well for this kind of situation where Windows sees the device but can’t open the file system.
The safer way to approach it is:
- Install Disk Drill on your main system drive, not on the external drive with the problem.
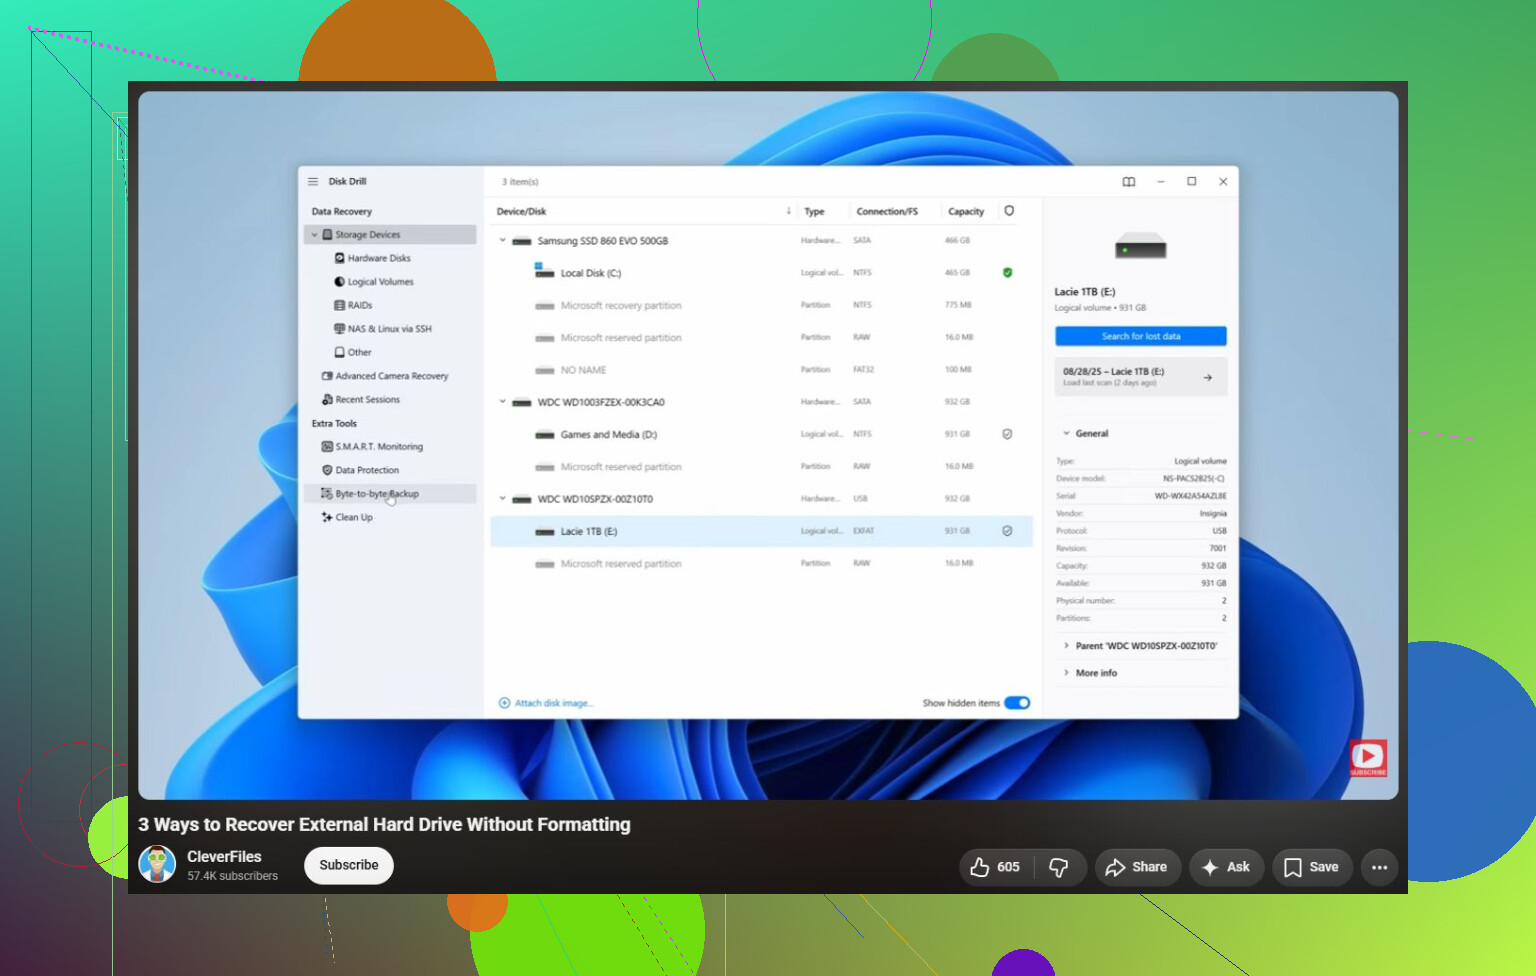
- Open it and find the external drive in the list.
- If the drive is acting flaky, use Byte-to-byte Backup before scanning. That makes a full image of the drive, so you can scan the copy instead of putting more wear on the original. This matters if the drive drops out, reconnects by itself, or makes odd noises.
- Scan the image, or scan the original drive only if it seems stable.
- Run a Universal Scan. It looks for existing files, deleted files, and data that can still be pieced together from the damaged file system.
- Preview files before recovering them. If photos, documents, or other important files preview correctly, that’s a good sign.
- Save recovered files to a different drive. Never recover them back onto the damaged one. The Windows free version allows up to 100 MB of recovery, which is usually enough to check whether the files are actually recoverable before paying.
After the important files are copied somewhere safe, then you can try repairing the drive.
If it’s NTFS, exFAT, or FAT32 and Windows still recognizes the file system, run this, replacing X with the correct drive letter:
chkdsk X: /r
If CHKDSK says the drive is RAW or won’t run, TestDisk is worth trying next. In a lot of cases it can rebuild damaged partition info or bring back lost partitions without formatting the drive.
If recovery is done and repair tools don’t fix it, a quick format is the next thing I’d try. That can clear the error if it was only a file system issue. But if the same problem comes back after formatting, I wouldn’t keep using the drive. At that point it starts looking more like hardware failure.
Also, one weird edge case: if you’re seeing this error with multiple drives or in other Windows tasks, check your regional settings. A wrong decimal separator has triggered this for some people. It’s not the usual cause, but it’s easy enough to rule out.
If the drive vanishes from Disk Management, clicks, keeps spinning up and down, or S.M.A.R.T. shows a lot of pending or reallocated sectors, stop trying DIY fixes. That usually points to a failing drive, and every extra power-on attempt can make recovery harder. If the files are important, a recovery lab is the safer move.
10 Likes
Don’t run chkdsk /r as your first “recovery” step. That command is for repairing the volume, and repair is the wrong order when you still need the files. I agree with the no-writing-to-the-drive advice, but I’d check the drive’s health before spending hours scanning it. If CrystalDiskInfo or the drive maker’s tool shows bad/pending sectors, make an image first or stop and consider a lab. If the drive looks healthy and Disk Management shows the correct capacity, then scanning with something like Disk Drill is reasonable, as long as you recover to a separate disk. If it shows as RAW, don’t format just because Windows asks. Cancel that prompt every time until your data is copied somewhere else.
You may get the files back, but assume the drive is unstable until you prove otherwise. A lot of people jump straight to file recovery software, but with external drives the USB enclosure or cable can be the weak link too. If it is a regular 2.5’ or 3.5’ SATA drive inside a cheap enclosure, the bridge board can throw weird Windows errors even when the actual disk is readable. If it is a sealed WD/Seagate portable drive, be more careful because some models use built-in USB boards or encryption, so pulling the drive out can make things worse or pointless.
I agree with the earlier “image first” advice, especially if the drive disconnects during access. If it stays connected and shows the correct size, Disk Drill or a similar recovery tool is fine for a first scan, but I would not let it run for hours on a drive that keeps resetting. That is when a clone/image makes more sense than repeatedly scanning the original. Every failed scan is still more read stress.
Small practical detail people forget: make sure your destination drive has enough free space before starting. If this is a 2 TB external with 1.4 TB of data, don’t recover to your laptop’s internal SSD and then wonder why the recovery stopped halfway. Recover the most important folders first if the software lets you choose, not the whole drive blindly. After the data is safe, then worry about CHKDSK, formatting, or whether the external drive is worth trusting again.
Don’t clone the partition, clone the whole physical disk. If the file system is what’s broken, making an image of only the damaged volume can miss the exact area you may need later. In recovery tools, pick the actual external drive device when possible, not just the drive letter Windows assigned to it.
The annoying part is that “The parameter is incorrect” can still happen when the files are mostly fine. Windows is picky about mounting a damaged volume. A recovery program may read the disk at a lower level and still find folders. Disk Drill can be fine for that, especially if you use its byte-to-byte image first, but the image needs to go to another healthy drive with enough space for the whole external disk, not just the used data. A 2 TB drive needs roughly 2 TB free for a full image.
If the drive starts dropping out, freezes the PC, or sits forever on the same bad area, I’d stop using normal Windows recovery scans on it. That’s where something like ddrescue is better than a pretty scanner because it can skip bad spots and resume instead of hammering the same unreadable section. It’s less friendly, but safer for a flaky disk. If you’re not comfortable with that, that’s the point where paying a lab may be cheaper than turning a recoverable drive into a worse one.
Small caveat that people overlook: if the drive was encrypted, locked by BitLocker, or came from a portable enclosure that does hardware encryption, don’t separate the bare drive from the original USB board unless you know exactly what model it is. You can make recovery harder by changing the path the data was written through.
So yes, people do recover from this error, but the safe order is: stop writing, image the whole disk if the data matters, scan the image, recover to a different drive, then repair or format only after you have the files. If you only need a few folders and the drive is stable, grab the most important stuff first instead of trying to “fix” the whole disk in one heroic pass.